Archive for the ‘Dogs’ Category

Top 10 tips for pets this firework season

As we move towards Bonfire Night, Diwali and New Year’s Eve, our love for fireworks has created an entire season of celebrations. While it’s exciting to have multiple opportunities to revel in the festivities, we must keep in mind that not everyone shares our enthusiasm. Our beloved pets, for instance, may not enjoy the noise and commotion caused by fireworks. To ensure the safety of your cats, dogs, and other pets during this firework season, we’ve compiled a list of ten helpful tips in this blog.

TIP 1: DESENSITISE YOUR DOGS AND CATS

If your pet is afraid of the loud noises, start desensitisation therapy as early as you can. Try downloading firework sound effects from Dogs Trust and play them very, very quietly. Reward your pet for staying calm, and over weeks or even months, gradually increase the volume so they get used to the sound.

TIP 2: MAKE SURE THEY ARE MICROCHIPPED

Panicking pets tend to run, but they’re not so fussy where they run to! If they DO escape and are microchipped you can be sure you’ll be reunited again.

TIP 3: USE PHEROMONES

There are pheromone products available for cats and dogs such as Feliway and Adaptil. They are very effective at reducing stress and anxiety levels. Start using them at least 2-3 weeks before fireworks season starts if possible.

TIP 4: TRY OUT SOME CALMERS

There are a wide range of herbal and nutritional calmers on the market; some of which we stock and can recommend. Although the evidence for Zylkene isn’t conclusive, we think it really can help settle animals down if given over a prolonged period!

TIP 5: BUILD A NICE NEST

Your pets need to be kept safe and secure, with a suitable nest or den to hide in. This is especially important for dogs and cats, but also applies to rabbits and small furries kept in open cages or hutches. Make sure they can hide themselves away when the displays start!

TIP 6: KEEP YOUR ANIMALS SAFELY INDOORS

It may be a little tricky but make sure your cat and dog are safely inside. Not only will it stop them escaping (and then potentially coming to harm), but it will also muffle any scary sounds and frightening lights.

TIP 7: LIGHTPROOF AND SOUNDPROOF HUTCHES, CAGES AND AVIARIES

If possible, rabbits and other small pets in cages or hutches should also be brought inside — or at least, away from sight and sound of the fireworks. For example, a large hutch can usually be moved into a garage or shed. For cage birds, the aviary isn’t usually movable, but the bright flashes can panic birds into a smother. As a result, we recommend carefully covering the aviary (while leaving lots of air-holes!) to minimise any risk.

TIP 8: KEEP TO A NORMAL ROUTINE

Many pets are very sensitive to changes in routine and timing and can put them on edge. So as much as possible, keep everything the same. You really don’t need any extra stress — and neither do they!

TIP 9: DON’T REWARD FEARFUL BEHAVIOUR

Of course, if your dog is afraid, your cat is scared, or your rabbit is terrified, it’s only natural to try and comfort them. However, you need to be careful. Excessive fuss and treats can reinforce the fearful behaviour — as they learn this is what they need to do to get your attention! As a rule of thumb, make a moderate fuss of them if they come to you, but don’t go to them, or dramatically change the way you react. Remember, pets can pick up on our stress levels as well as vice versa, so it can spiral out of control!

TIP 10: COME AND TALK TO US

If your pet is really, really stressed and you’re worried they’ll hurt themselves — come and talk to us. Not only can we give you personalised and tailored advice, but our vets can, if necessary, prescribe anti-anxiety medications to relieve short-term stress, fear and panic.

Pet Eye Health Awareness Week

Can you recognise the seven common signs of poor pet eye health? We are taking part in National Pet Eye Health Awareness Week (18-24 September) in partnership with TVM UK who have shared the most important things to look out for.


1. Asymmetry

Careful observation of the way your pet looks and acts and what is classed as ‘normal’ for them is the first critical step for responsible pet care. Regarding eye health, any perceived changes in your pet’s eyes can be a good indication of whether or not a trip to your vet is warranted. Do both eyes look like each other, are the face and head symmetricalAsymmetry when comparing right to left?

Useful Observations:

  • Do they both look shiny and clear, not dull, cloudy, or dry?
  • Are the pupils the same size and shape?
  • Is one eye squinting?
  • Is one eye runny with watery or sticky discharge?
  • Is the colour the same? Does one look red? Has the iris suddenly changed colour?

If one eye is showing differences from the other eye or any of the above clinical signs, please get your pet checked by your vet as soon as possible.


2. Irritation

Eyes are extremely sensitive and easily irritated – did you know that the cornea has around 20-40 times more nerve endings than the tooth root? And most of us know how painful toothache is…

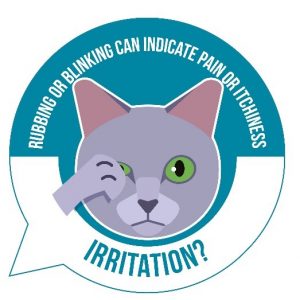
If you believe that your pet is suffering from eye irritation you should contact your vet for advice as irritation can be a sign of eye pain or itchiness.Irritation

Symptoms that may suggest that your pet is suffering from eye irritation:

  • Pawing/rubbing at their eye/s
  • Redness
  • Squinting or excessive blinking
  • Excessive tear staining
  • Sticky or runny discharge
  • Light sensitivity
  • Swollen skin around the eyes
  • Dullness or cloudiness of the eye
  • Different pupil sizes

Some common reasons which may cause eye irritation in your pet:

  • Allergies
  • Conjunctivitis
  • Foreign object in the eye
  • Eyelid Abnormalities
  • Trauma
  • Corneal scratches/ulcers
  • Irritants – smoke, shampoo, etc
  • Dry eye (poor tear film)

Eye problems can be very painful and go from bad to worse very quickly so don’t delay in seeking advice and treatment from your vet!


3. Blindness

Like us, pets often experience gradually failing eyesight as they approach their senior years and due to compensation using their other, superior, senses like smell and hearing, gradual sight loss may not be easily noticed by pet owners.

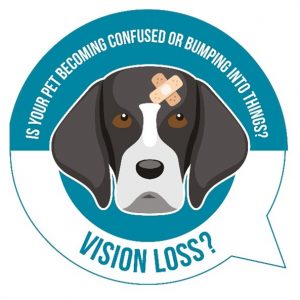
However, there are many other conditions that can cause your pet to go blind relatively suddenly at any age, so it is important to be vigilant of sudden changes or symptoms.Vision Loss

Symptoms of acute eyesight loss you may notice are:

  • Changes in the appearance of the eye
  • Confusion/disorientation
  • Clumsiness – bumping into things
  • Easily startled or nervous
  • Slow and cautious movement
  • Getting lost outside
  • Unable to find toys, food dishes, water, etc.
  • Not wanting to go out at night

Conditions causing blindness are serious and need urgent treatment if there is any remaining chance to prevent total, permanent vision loss. Blindness can also be a result of many systemic diseases which can be damaging to other organ systems so it is extra important to get your pet checked and treated.

Conditions that can cause blindness:

  • Tumours in the eye
  • Eye injuries
  • Glaucoma
  • Brain disease – Aneurism, Stroke, Seizures, Tumours, or Infection
  • General Disease – e.g. diabetes, hyperthyroidism
  • Cataracts – more common in Miniature Poodles, Miniature Schnauzers, Cocker Spaniels, Golden Retrievers, Boston Terriers, and Siberian Huskies
  • Corneal disease
  • Dry eye
  • Retinal Disease
  • Inflammation inside the eye

4. Tear Staining

Tear stains are those reddish-brown marks that can appear on the fur around your pet’s eyes. These stains can be unsightly and noticeable, especially on pale fur.

Dog and cat tears naturally contain high amounts of porphyrins – these are iron-containing compounds derived from red blood cell breakdown in the body. When tears sit on the skin the porphyrin staining will intensify in the presence of light.

Not only that, when tears sit on the skin around the eye, they make it damp which favours local bacterial growth – some bacteria can produce their own porphyrins, therefore, contributing to tear staining.Tear Staining

Tear staining is more likely to occur in certain breeds where tears find their way onto the face more easily, rather than draining normally down the tear ducts. For instance, this may be due to the shape of the face, abnormalities of the tear ducts, or small hairs around the corners of the eye that wick tears onto the face.

In most cases tear staining is largely a cosmetic problem and your pet will lead an otherwise normal life, however, some patients with tear stains may have underlying eye problems which means they overproduce tears due to ocular irritation. These tears can then spill over onto the face resulting in tear staining. It is important to ensure underlying reasons for tear staining have been ruled out by a vet as, if ignored, the underlying problem may progress and be harder to treat.


5. Redness

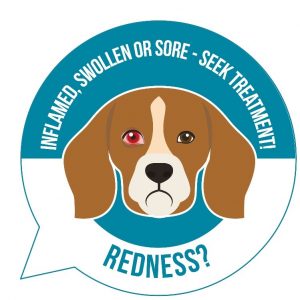
Your pet’s eyes are as sensitive as your own and are just as susceptible to irritation, allergies, injury, and disease. One of the earliest signs of many eye problems is a red eye. If your pet’s eyes appear visibly red or swollen get them checked ASAP by your vet as some causes of a red eye are not only painful but can lead to permanent blindness if left untreated (such as glaucoma).Redness

Common causes of redness:

  • Conjunctivitis
  • Allergies or irritants
  • Foreign object in the eye
  • Dry Eye
  • Injury
  • Uveitis (inflammation inside the eye)
  • Corneal Ulcers
  • Glaucoma
  • Cherry Eye

6. Dull, Cloudy, or Colour Change

Healthy eyes should be bright, clear, and shiny — if your pet’s eye suddenly looks cloudy or opaque this is a sure sign of an eye problem that needs to be examined by a vet!

Most often cloudiness is noticed in the cornea (the clear window at the front of the eye) or the lens- vision may be affected to varying degrees depending on the underlying cause.Dull, cloudy or colour change

Conditions most likely to cause cloudy or opaque eyes:

  • Cataracts
  • Uveitis- inflammation inside the eye
  • Pannus- autoimmune inflammation in the cornea, German Shepherds are predisposed
  • Injury or damage to the eye/s
  • Corneal ulcers or scratches
  • Dry Eye
  • Glaucoma

Nuclear Sclerosis is considered a normal ageing change in older pets where the lens takes on a cloudy or blueish haze – it doesn’t affect vision but can often be confused with cataracts at first glance. Your vet can easily distinguish between the two conditions by doing an eye exam.


7. Runny or Sticky Eye

Eye discharge is a common problem in pets. Some types are completely normal, while others may be associated with potentially serious health concerns. In order to determine when you need to take your pet to the vet, you’ll need to understand the various types of eye discharge and what each may mean.

5 most common types of eye discharge:

  •  A little ‘gunk’ or crustiness – generally made out of dried tears, oil, mucus, dead cells, dust, etc. Typically, clear or a slightly reddish-brown colour that accumulates at the inside corners of the eyes. Most evident in the morning and is perfectly normal, with the amount produced each day being relatively constant. It should be easily removed with a damp cloth or eye cleansing solution made for pets. The eyes shouldn’t be red and shouldn’t exhibit any signs of discomfort.
  • Watery Eyes – Excessive eye watering (AKA epiphora) is associated with many different conditions that can range from being relatively minor to more serious. Below are some of the common causes of watery eyes in pets:
    • Allergies
    • Irritants
    • Foreign body in the eye
    • Anatomical abnormalities (e.g. rolled in eyelids)
    • Blocked tear ducts
    • Corneal wounds
    • Glaucoma (increased eye pressure)

Your pet may have simply received an eyeful of pollen or dust, and the increased tearing is working to solve the problem. If eyes continue to water or your pet develops red, painful eyes or other types of eye discharge, make an appointment with your vet.Tear Staining

  • Reddish-Brown Tear Stains – many pets, especially those with light-coloured fur, develop a reddish-brown discolouration to the fur near the inner corner of their eyes. This occurs because tears contain a pigment called porphyrin that turns reddish-brown with prolonged exposure to air. In most cases tear staining is cosmetic and can be removed with eye cleansers however sometimes it may be due to an underlying disease causing excess tearing so it is advisable to get tear stains checked by a vet.
  • White-Grey Mucus – This can be a sign of Dry Eye (AKA keratoconjunctivitis sicca), a condition where the tear film becomes inadequate. A normal tear film is vital for good eye health so the body tries to compensate by making more mucus to try and lubricate the eyes. Left untreated Dry Eye can result in severe discomfort and potentially even blindness.
  • Yellow or Green Eye Discharge – pets whose eyes produce yellow or green discharge often have conjunctivitis or an eye infection.

If you have any concerns, get in touch with your local Goddard vet for advice, or make an appointment online.

How to cut your dog’s nails safely at home

Keeping your dog’s nails trimmed is an important aspect of pet care, but many pet owners struggle with the task. Nail cutting can be stressful for both the dog and the owner, especially if the owner is inexperienced or the dog has a nervous personality.

Taking your dog for regular walks on hard surfaces such as pavements will help to keep their nails short, although this isn’t enough in most cases. If your dog’s nails get too long, they’re at risk of being torn off on carpet, furniture or when outdoors.

In this short guide, we will show you the best way to cut your dog’s nails at home in a safe and stress-free way. Whether you’re a new dog owner or have been caring for a furry friend for years, we will provide you with all the tips and tricks you need to ensure a smooth and successful nail-cutting process.

Preparation

Clipping your dog’s nails can be tricky and is often very anxiety-inducing for your pet. There are a few steps you should take before you try to cut your dog’s nails for the first time to make the process much easier, especially if you have a puppy.

”My dog won’t let me cut their nails”

This is something we hear all the time. Getting your dog used to nail clippers is a huge step in ensuring a stress-free and safe grooming experience for both you and your furry friend. Here are some steps you can follow to help your dog get used to nail clippers:

  • Start slow: Introduce your dog to the clippers gradually, letting them sniff and inspect the clippers before any actual clipping takes place. This will help them feel more comfortable with the tool.
  • Positive reinforcement: Reward your dog for good behaviours, such as allowing you to touch their paws or letting you hold the clippers near their paw, with treats or praise.
  • Practice touching paws: Regularly handling and massaging your dog’s paws will help them become comfortable with having their paws touched and manipulated.
  • Short clipping sessions: Begin with short clipping sessions, slowly increasing the duration as your dog becomes more comfortable. This will help them adjust to the sensation of having their nails trimmed.
  • Patience: Getting your dog used to nail clippers can take time, so be patient and never force the process. If your dog becomes distressed, stop and try again another time.

What you’ll need…

  • Pet nail clippers: It’s important to use sharp nail clippers, and best to use those specifically made for pets. You can use human clippers if they’re sharp, but don’t use human nail scissors.
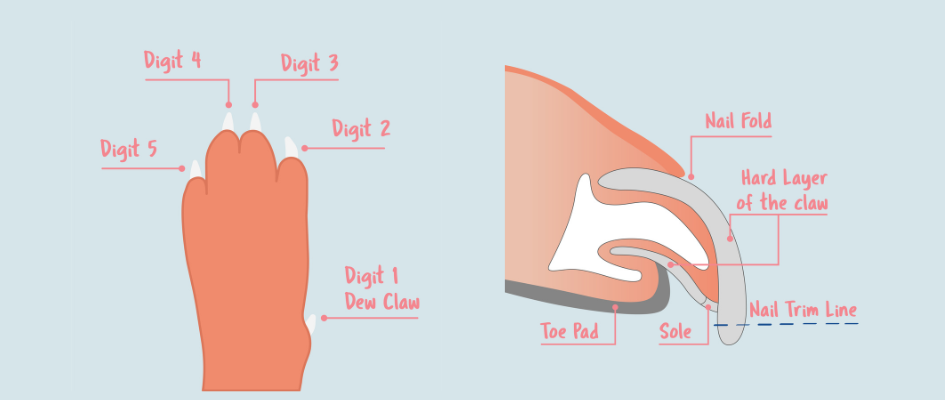
  • Good lighting: Cut your dog’s nails in a room that is well lit. This is so you can see where to make the cut and avoid hitting “the quick”, which is the sensitive part of the nail that contains nerves and blood vessels. Catching this can cause bleeding and pain.
  • A partner: If your dog is particularly nervous or resistant to having their nails clipped, it can be useful to ask someone to help you. This could be to support the restraining of the dog or keeping them calm.
  • Lots of treats: Have a supply of treats on hand to reward your dog for being a good boy/girl throughout the session! This is vital for positive reinforcement.

It’s important to note that if your dog’s nails are growing into the skin or they are particularly anxious or aggressive, you shouldn’t attempt to clip them yourself. In a scenario like this, it’s best to contact your vet.

How to clip your dog’s nails: step by step

  1. Get your dog comfortable: Make sure your dog is relaxed and comfortable and give them plenty of praise and treats to help them feel at ease.
  2. Position your dog facing away from you: The person holding the dog should have one hand cradling the head and the other reaching over the dog’s shoulder to extend the leg, using the pressure of their arm to help calm the dog’s body. Hold the leg up around the elbow. It is important that you both feel comfortable that your dog is not at risk of biting you or your partner.
  3. Examine your dog’s paws: Take a close look at your dog’s paws and get familiar with their nails. Look for “the quick”, the pink part of the nail that contains nerves and blood vessels, and avoid cutting it.
  4. Start slow: Start with just one or two nails at a time, taking each, in turn, to allow your dog to get used to the process before proceeding. Press down near the nail bed to make it more visible.
  5. Make the cut: Hold the clippers at a 45-degree angle, and cut the nail just before the quick. If you accidentally cut the quick, use a piece of kitchen towel to apply pressure to the area. Any bleeding should stop after approximately five minutes, but if it continues, contact your vet.
  6. Reward your dog: After each successful cut, reward your dog with praise and a treat. This will help build a positive association with the nail-cutting process.
  7. Repeat: Repeat the process with each nail, and be sure to take breaks if your dog becomes uncomfortable or restless.

If you are in need of further advice or are concerned your dog may bite you during the nail clipping, book an appointment with your local Goddard vet practice or get in touch with our Central Clinical team at 020 8506 9944.

A simple guide to applying ear drops to your dog

Applying ear drops to your dog can be a daunting task for any pet owner. However, with the proper knowledge and technique, administering ear drops to your furry friend can be a simple and stress-free process.

In this guide, our very own vet, Victoria, will walk you through the proper way to apply ear drops to your dog. This includes how to properly clean the ear, the best way to administer the medication, and how to monitor your dog’s recovery. With the right approach and care, you can ensure that your dog receives the treatment they need to maintain its ear health. So, let’s get started!

Before application

In preparation for treating your dog, you should always aim to apply medicated drops to a clean ear. Watch our video above on how to clean your dog’s ears before applying any drops.

It’s important to consider that your dog may be in some pain or discomfort with its ear and might not respond well to you cleaning/treating the area. Even the calmest, gentle, and most passive dog may react with a struggle, bark, growl, or even bite. To avoid this, be cautious and patient with your dog. For particularly reactive or anxious dogs, you may find it useful to apply a muzzle before the procedure for added safety.

How to easily apply ear drops to your dog

  1. Wait 15 minutes after cleaning your dog’s ears before you begin applying the medicated ear drops.
  2. Check the medication label, including the dose and frequency of application. The instruction sheet supplied with the drops will give you advice on how to use that particular ear treatment.
  3. Make sure that your dog is in a comfortable position. If you have a small dog, positioning them on your lap is a good idea. Otherwise, laying them down on a flat surface or sitting them in front of you can make applying ear drops easier.
  4. Prepare the medication according to the instructions that accompany the bottle. You can roll the bottle in your hand to warm up the liquid beforehand so that it’s not as cold before applying it to the ear.
  5. Whilst holding the pointy end of the ear up, you can introduce the nozzle of the bottle/pipette to the ear canal and carefully begin to apply the number of drops stated on the label. Sometimes it can be difficult to know how much pressure to apply to form a drop, so it can be useful to practice on a piece of kitchen roll first if you are unsure.
  6. Once the drops are applied, you can gently massage around the base of the ear in a circular motion. This helps the medication reach the whole of the ear canal. If your dog is in any discomfort, they may not let you do this – be gentle and patient with them.
  7. After applying the drops, your dog will begin head shaking. Don’t worry – this is normal. Now, move on to the next ear, if it also needs treatment, and repeat!

Treating your dog’s ear infection with antibiotics

When treating your dog with antibiotic ear drops, it’s crucial to adhere to the correct dosage instructions provided to you. Avoid breaks in treatment and be sure to attend your follow-up appointments as advised. As long as you follow these guidelines, you should expect to see your furry friend back to their best in no time!

Dogs can be prone to recurrent ear infections. If your dog has had a flare-up and you have not seen a vet recently, please arrange a check-up before treating at home. Never apply old ear drops that you’ve given to your dog previously without a check-up beforehand – you need to make sure you have enough for a full course of treatment recommended by a vet.

If you are having trouble administering the treatment or you notice a head tilt
developing after using medicated drops that don’t seem to be returning to normal, please contact your local Goddard vet practice or get in touch with our Central Clinical team.

Useful tips for applying ear drops to your dog

  • Help get your dog used to ear drops by presenting them with treats and other items like toys with the treatment bottle around. Over time, your dog will begin to associate the treatment with something positive, rather than a negative outcome. You can try this several times a day to acclimate your dog to the ear drops.
  • Make an effort to message your dog’s ears as regularly as possible. This will get the dog used to you touching their ears and the areas around them, making applying treatments like ear drops more ordinary to the dog.
  • Choose a quiet environment within your home to apply the ear drops. Choosing somewhere with no distractions will help to relax your dog, especially if it can get anxious. This can make the application process much easier.

If you need further advice, book an appointment with your local Goddard vet practice, or get in touch with our Central Clinical Team at 020 8506 9944.

Our support for London Retired Police Dogs

Rusty, a nine-year-old Labrador cross Cocker Spaniel, has been receiving treatment for a rare skin condition as part of our support of the charity London Retired Police Dogs Trust (LRPD).

Rusty served for six years as a search dog with the Metropolitan Police, sniffing out drugs, firearms and money, and many of his finds helped lead to convictions. Due to being such a trusted member of the force, he was part of the team tasked to search the Trooping the Colour route to ensure it was safe for the Queen’s procession to take place.

Rusty suffers from an ongoing condition that affects the skin around his eye and he has been receiving treatment at our South Woodford Practice.

All of our 44 veterinary practices and three veterinary hospitals in and around Greater London, support retired service dogs with discounted veterinary treatment through the LRPD. The charity funds veterinary care for dogs that have served with the Metropolitan Police, City of London Police and London Fire Brigade.

Rusty has been treated by Adam Thoms, a vet at our South Woodford branch in Woodford Road who has a certificate in small animal ophthalmology.

He said: “Rusty came in to see us because he had a recurring sore patch in the corner of one eye, which was causing him a bit of discomfort. We carried out tests, which revealed he suffers from a chronic inflammatory skin disease. Rusty’s case is quite unusual because while Labrador’s sometimes have this condition around their nose, but I’ve not seen it around the eye before.

“Rusty’s condition is being managed with medication and he’s responded very well to treatment and is feeling much more comfortable.

“He is a lovely, calm and friendly dog who has done an incredible service for people living in London, so being able to help him has been very rewarding.”

Since standing down from official duties, Rusty lives in the Loughton area with his former handler Duncan who has also now retired from the force.

Duncan said: “Rusty was a brilliant working dog and recovered firearms from locations that had already been thoroughly searched. He also uncovered large quantities of cash and drugs and was able to locate single bullet casings from busy streets that would otherwise have been like looking for a needle in a haystack. The power of his nose never ceased to amaze me.

“He’s received a very high standard of care from Goddard Veterinary Group and I’m grateful to the practice and LRPD for helping keep Rusty healthy. When police officers retire they get a pension, but service dogs don’t receive any financial support and many have pre-existing conditions that have been a direct result from being in the line of duty. The cost of care falls to the handlers like me, so to receive support with his veterinary bills makes a massive difference.”

Emma Dignam is a serving police officer who was a co-founder of LRPD in 2019, achieving full charity status in 2020, said: “We are delighted to be working with Goddard Veterinary Group and hope that through our partnership we can help many more service dogs like Rusty enjoy a happy and healthy retirement.”

If you would like to find out more about the charity, visit: www.lrpd.uk


Are you in East London and would like to register your pet with us? Find out more about our locations below.